Winning
When all other Earls have left the table you have won the game. If an Earl believes that the cause is lost, they may concede honorably during their turn. There are two ways that an Earl may be forced off of the table.
• An Earldom is destroyed, and its Earl is out of the game, when it loses its last Fief. That is, when an Earl has no Castles or Palaces on the table. When this happens you are no longer a great Earl and are no longer in contention to rule the land.
• When an Earl cannot draw a required card, like the card draw that ends their Turn, because none remains in their Earl Deck, then that Earl is out of the game. In this case, the Earl is considered to have passed away peacefully in the night, without an heir to carry their flag forward.
A Turn
An Earl is not required to take an Action during his Turn, but he must still draw a card to end his Turn.
• Take 1 Action.
• Place any number of Towers or place any number of Army Cards in garrison slots, at any time during your turn.
• Draw 1 card from your Earl Deck, this is required and ends your Turn. If an Earl has no card to draw, he is considered to have "passed away" and is out of the game.
Actions
• Playing a card from the Hand: placing a Property or Castle on the table; creating a Lord by placing a Face Card into a Castle; placing a Mercenary Card on the table; or playing a Political Card (e.g. a Banquet, Banner, Treachery, or Intrigue card).
• Attacking another Earl by Raiding a Fief, Sieging a Castle, or attacking an Earldom's Towers.
• Recruiting from the Army Deck; only possible if an Earl has at least 1 Land in his Earldom.
• Sending a Vassal or Monk from the Hand to the Vikings as an Emissary.
• Using the special ability of a Monastery to force another Earl to reveal his Hand.
Bequeathing your Earldom
To Bequeath, play a Banner card on top of your Prince Lord. Both the Banner and the Prince Lord will be sent to your discard pile, and then your entire discard pile will then be reshuffled into your remaining Earl Deck. Creating a new Earl Deck with more cards than before.
You will not be allowed to play a Banner card on your Prince Lord, to Bequeath, if the Cathedral is on the table in another Earldom! However, if you have a Church in your own Earldom you will still be able to Bequeath despite the presence of the Cathedral in another Earldom.

When an Earl is required to draw a card but cannot, they are out of the game and have passed away from old age without managing to successfully hand the reigns of their Earldom to the next generation of their great family.

Combat
Three Types of Attack
A Tower Attack
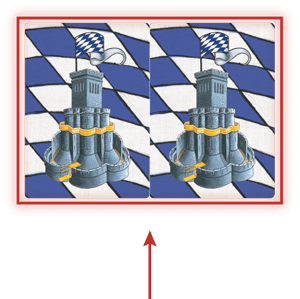
Raid on a Fief
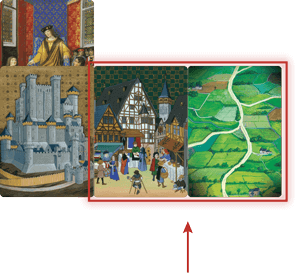
A Castle Siege
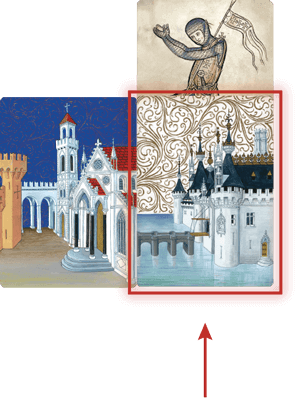

Battle Deck Results
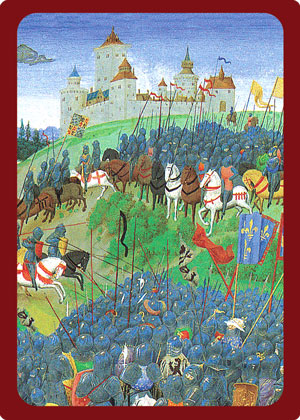

Fielding Forces
Fielding refers to sending forces out into battle, either on attack or defense. An attacker must both announce the target of their attack and then, also, field all forces being sent into that battle. The defender will then choose what forces to field, if any; but if no forces are Fielded in defense then no Battle Result card will be drawn.
Fielded forces can include Face Cards from the Hand - A Prince, Vassals, Champions, even Monks. But remember that an Earl can only have 1 Prince in play. For example, if you have a Prince Lord already you may not instead play a Prince from the Hand. Mercenaries also cannot be Fielded directly into combat from the Hand.
Fielded forces can include a Mercenary or the King Card, if they are already on the table. Any garrisoned Army cards with either Mercenaries or the King Card can also be fielded, with or without the Mercenary or King Card, and these Army Cards when already in Garrison do not require Lands to Field.
Fielded forces can include Army Cards from your Army Card pool. One Army Card from you reserve can be Fielded into a battle for each Land that you possess, anywhere, in your Earldom. In the special case that you have a Market Town and Land(s), in the same Fief, then each of those particular Lands allow you to Field 2 Army Cards into a battle instead of the normal 1 Army Card.
An Earl can Field cards from their Army Card pool using Lands from anywhere in their Earldom, no matter what part of their Earldom is under attack, or what target they are attacking.
Note that the Vikings, like garrisoned Army Cards, never require Lands to be fielded into battle (they pillage and supply themselves!). And when the Vikings are directed to attack a target, they always Field all of the forces that they have on the table.
Damage points in a battle are always first assigned to the Fielded forces. The attacker assigns damage first to their Fielded forces. Only after all incoming damage points from an attack are assigned to the defender’s Fielded forces, 1 to each fielded card, do any incoming damage points reach the target of the attack: either Towers if it was a Tower attack; a Castle or Palace if it was a Siege; or the attached Properties of a particular Fief if it was a Raid.
Allocating Damage to Fielded Forces
• The King Card takes 1 point of damage in Combat and is never killed or discarded. If the King Card is used, it is the obvious first choice to accept damage.
• Face Cards (Vassals, Champions, Monks, or a Prince) played from the Hand into Combat are discarded after the Battle but can still take 1 point of damage. Thus, damage should also be assigned to them first.
• When Lords (or Abbots) are fielded, they can take 1 point of damage each and, unless they are captured, return to their Castles after the Battle. Even when the Battle Card goes against an Earl and his fielded Lords are captured, they still can be allocated their 1 point of damage. If they are not Ransomed, they will then be killed and discarded at the end of the Battle.
• Army Cards are killed and discarded when they take 1 point of damage, whether Infantry or Knight, and whether garrisoned with a Mercenary or in the Royal Army. Because they perish in Battle if assigned damage it generally should be allocated to them last.
• A Mercenary Card is killed and discarded when it takes 1 point of damage, just like the Knight Army Card. The death of a Mercenary also causes any Army Card garrisoned with it to be discarded. In this case, assign damage first to the garrisoned Army Card, if it was fielded.
Strength and Damage

Sends 2,
Takes 1
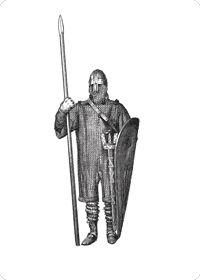
Sends 1,
Takes 1

Sends 2,
Takes 1
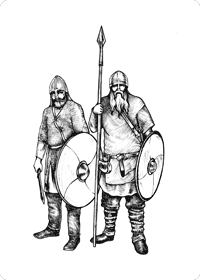
Sends 1,
Takes 1
All forces take only 1 damage.
All forces send 1 damage except for:
- Knights 2
- Champions 2
- Mercenaries 2
- Chieftains 2
- And Monks send 0
| Face Cards | Sends/ Takes | Army Cards | Sends/ Takes |
|---|---|---|---|
| Prince | 1 / 1 | Infantry | 1 / 1 |
| Vassal | 1 / 1 | Knights | 2 / 1 |
| Champion | 2 / 1 | ||
| Monk | 0 / 1 | Vikings | |
| Mercenary | 2 / 1 | Viking Infantry | 1 / 1 |
| Chieftain | 2 / 1 |
The King Card is a 1/1 card.
| Castles & Towers | Takes | Properties | Takes |
|---|---|---|---|
| Palace | 3 | Land | 1 |
| Castle | 2 | Market Town | 1 |
| Church | 1 | ||
| Tower | 1* | Cathedral | 1 |
* — Towers absorb 1 incoming point of damage without being destroyed unless specifically targeted.
Ransoming Lords
When the Battle Card results in an Earl's fielded Lords being captured, then that Earl must immediately decide whether and how he will Ransom his Lords to get them back when the Battle is over. If he chooses not to Ransom his Lords, then any fielded Lords are killed and discarded when the Battle is over (their Castles will remain, however, as this is not a Treachery assassination). Captured Lords still take 1 point of damage on the field. But Ransoming must be resolved before the rest of the damage is allocated.

To Ransom his Lords, an Earl must give 1 Property or Castle from his Earldom for each Lord he wants to save. These are then given to the Earl who captured his Lord(s). The recipient of this Ransom payment places each Property and Castle in his Earldom. The Earl who must make the payment can select any Property or Castle he possesses to Ransom, even a Castle with another Lord in it (who is then discarded) or a Property or Castle he knows will be destroyed as a result of this Battle. An Earl who had 2 of his Lords captured could also use 1 captured Lord's Castle to Ransom the other, thus saving 1 Lord but dooming the other by giving away his home.
The end result of Ransoming can occasionally mean that upon resolution of the Battle, the attacker ends up with nothing more than he anticipated receiving. However, it can also mean the attacker takes home something unexpected or even more "prizes" than the normal limit of 2 (e.g. when attacking with both a Prince Lord and a Vassal Lord).
After Ransoming is resolved, the allocation of damage and the resolution of the Battle proceed as normal. The one exception: The Vikings never accept Ransoms, and any Lords captured in a Battle with the Vikings are killed and discarded

Jousts
To initiate a Joust, toss a Banner Card into the center of the table as an Action. The Joust then commences in a clockwise manner, starting with the Earl to the left of the Joust initiator (who makes his choices last).
Each Earl must make two decisions:
- Select one Property or Castle in his Earldom to ante for the competition. An Earl is not required to ante, and enter the Joust, if doing so would remove his last remaining Fief.
- Decide whether to tilt in the Joust itself. To tilt, select either a Lord from a Castle or place any card from the Hand face down in the center of the table.
An Earl may also opt out of the Joust by playing a Banner Card. In this case no ante is offered, and no tilt card is placed. Even the Joust initiator may opt out by playing a second Banner Card.
In the Joust itself 2 Joust Deck cards will be dealt to every Tilter competing around the table. An Earls Tilting card plus the 2 Joust Deck cards represent their Joust Hand.
Joust Deck Cards

The Joust Deck includes 12 No Luck cards, 6 Princes
and 6 Vassals.
The Joust is resolved like a simple game of poker. Princes are ranked highest, Vassals are ranked second-highest, while Champions are wild and may count as either a (natural) Prince or Vassal. No other card has value. 3 of a kind beats 2 of a kind, and high card matters.
Ties are resolved with a separate round of "high card wins" between those Earls who tied in the original competition. Repeat the "high card wins" until a victor is determined.
The winner of a Joust receives all ante'd Properties and Castles, which he then places in his Earldom. All cards played from each Earl's Hand into the Joust are discarded, as are all Lords entered into the Joust, except a winning Lord, who remains.

Vikings
The Viking Timer
While the Vikings are approaching, and after a Round in which no Combat has taken place, 1 Black Time Marker is moved forward at the start of their Turn. As soon as all 8 Markers have been moved forward, the Vikings arrive on their turn.
When there is combat move the White Combat Marker forward (or leave it forward if this has already occurred). Combat will slow the arrival of the Vikings.
If the White Marker has been moved forward, on the Vikings' Turn, move it back behind the Viking Deck, instead of moving a Black Timer Marker forward.
When the Vikings arrive all Markers are removed from play.
The Vikings' Arrival
The Viking army's size, on arrival, is equal to the number of players who started the game, plus one, cards (N+1).
At the start of each subsequent Vikings' Turn, draw one Viking Card and add it to their force. If the Viking force then includes more cards than the number of starting players, they are active that turn.
Control of the Viking Army
On any Turn in which the Vikings are active, use the Bag to determine which Earl will direct their attack on that Turn.
Draw a cube from the Bag to determine control of the Vikings for that turn. That player may direct how and where the Vikings attack (or choose not to attack). When Vikings attack, they do so in full force, and Earls may not support them. Vikings never seize, capture, or accept Ransom, and cannot be directly attacked by an Earl.
Emissaries to the Vikings:
Vassal — 1 extra cube in the Bag
Monk — 2 extra cubes in the Bag
Move 1 black Viking Time Marker forward when an emissary is sent. Emissaries may still be sent after the Vikings have arrived, in which case no Marker is moved forward.
Property Cards
Face Cards
Political Cards
Game Dashboard


